Are Custom Blinds Resistant to Fading in Sunny Areas?
June 12, 2024
Are Blackout Blinds Ideal for Home Theaters?
June 14, 2024How to Install Custom Window Blinds Yourself
Are you a homeowner eager to enhance your living space with custom window blinds, but hesitant about the installation process? You’re in the right place. This guide is tailored for DIY enthusiasts who want to elevate their home aesthetics without hiring a professional. For a detailed guide on technical specs, check out Fenstermann’s technical details.
Key Takeaways:
– Step-by-step process for installing custom window blinds.
– Essential tools and materials.
– Troubleshooting common installation issues.
– Maintenance tips for long-lasting blinds.
Understanding the Basics of Custom Window Blind Installation
Before diving into the nitty-gritty of installation, it’s crucial to understand the basics. Custom window blinds vary in type, including vertical blinds, wood blinds, and more. Each type demands specific techniques and tools for a successful installation. For a comprehensive guide on installing vertical blinds, visit this Blinds.com resource.

When it comes to installation, preparation is key. Ensure you have the necessary tools, such as a drill, measuring tape, level, and screws. Measure your windows precisely to avoid any fitting issues. Remember, the accuracy of your measurements can make or break the installation process.
Discover the ease of DIY window blind installation with our expert tips – get started today! Learn more about ordering custom blinds.
Step-by-Step Guide to Installing Window Blinds
-
Measure Twice, Cut Once: Start by measuring the width and height of your window frame. Precision is essential here. Incorrect measurements can lead to improper fitting and functionality issues.
-
Mark the Bracket Locations: Use a pencil to mark where the brackets will be installed. Typically, brackets are placed at the top corners of the window frame. Use a level to ensure they are aligned properly.
-
Drill Pilot Holes: Drill small pilot holes where you marked the bracket locations. This makes it easier to screw in the brackets and ensures they are securely fastened.
-
Attach the Brackets: Use screws to attach the brackets to the window frame. Make sure they are tight and secure.
-
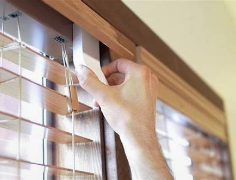
Install the Blinds: Once the brackets are in place, insert the blinds into the brackets. Secure them according to the manufacturer’s instructions.
-
Adjust and Test: Adjust the blinds to make sure they open and close smoothly. Test them several times to ensure they are functioning correctly.
For a detailed guide on installing wood blinds, refer to this Blinds.com tutorial.
Troubleshooting Common Installation Issues
Even with the best preparation, you might face some challenges during the installation process.
Misaligned Brackets
If your brackets are not aligned correctly, the blinds won’t fit properly. Use a level to check the alignment before drilling any holes. If necessary, adjust the bracket positions and re-drill the pilot holes.
Blinds Not Fitting
If you’ve followed the measurements correctly but the blinds still don’t fit, double-check your measurements. Sometimes, window frames can be slightly uneven, requiring minor adjustments.
Difficulty in Operating Blinds
If the blinds are difficult to open or close, the brackets might be too tight. Loosen the screws slightly and test the blinds again.
Maintenance Tips for Long-Lasting Blinds
Maintaining your custom window blinds is essential for their longevity and optimal performance.
Regular Cleaning
Dust and dirt can accumulate on your blinds, affecting their operation and appearance. Use a soft cloth or duster to clean them regularly. For deeper cleaning, follow the manufacturer’s instructions.
Lubricate Moving Parts
To ensure smooth operation, lubricate the moving parts of your blinds periodically. Use a silicone-based lubricant to avoid any damage.
Inspect for Wear and Tear
Regularly inspect your blinds for any signs of wear and tear. Replace any damaged parts promptly to prevent further issues.
Conclusion
Installing custom window blinds yourself can be a rewarding and cost-effective project. With the right tools, precise measurements, and a bit of patience, you can achieve professional-looking results. Remember to follow the step-by-step guide, troubleshoot any issues, and maintain your blinds for long-lasting beauty and functionality.
Frequently Asked Questions
How do I measure my windows for custom blinds?
Measure the width and height of your window frame at three different points (top, middle, bottom). Use the smallest measurement for width and height to ensure a proper fit.
What tools do I need for installing window blinds?
Essential tools include a drill, measuring tape, level, pencil, screws, and a screwdriver.
Can I install window blinds without drilling?
Some window blinds come with adhesive brackets or tension rods that require no drilling. However, these might not be as secure as drilled brackets.
How often should I clean my blinds?
Regular dusting should be done weekly, while deeper cleaning can be performed monthly or as needed.
Ready to transform your living space with custom window blinds? Start your DIY project today and enjoy the benefits of a beautifully enhanced home. Learn more about technical details.


